Below is a step wise guide on how to submit GSTR-3B using GSTplus.com
Step 1 Visit https://GSTplus.com/downloads and click on ‘Download’ button of ‘GSTR-3B and GSTR-1 Excel’.

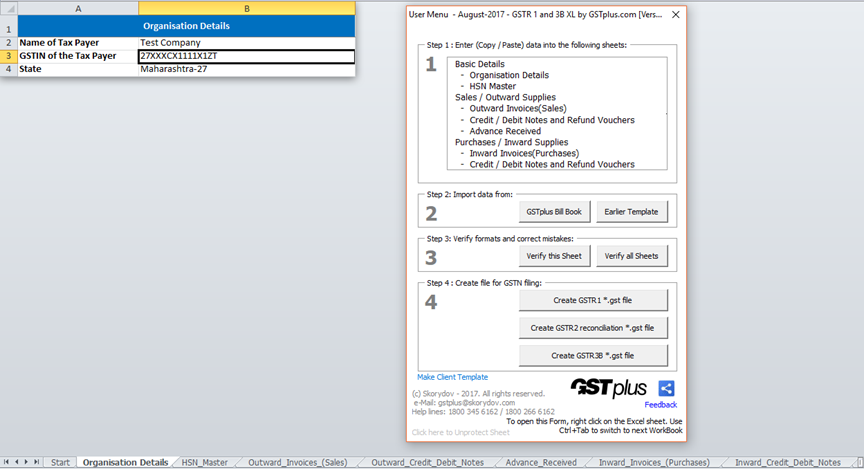
Step 2 Extract the excel template and enter the details. If you are our BillBook software user, you can import data to excel in one go. Once all the details are entered, right click on any sheet and go through the steps as per applicable to you. When you click on 'Verify this sheet / Verify all Sheets", errors if any, will be displayed. Correct the errors. Now click on ‘Create GSTR-3B *.gst file’ to export data for GSTR-3B.
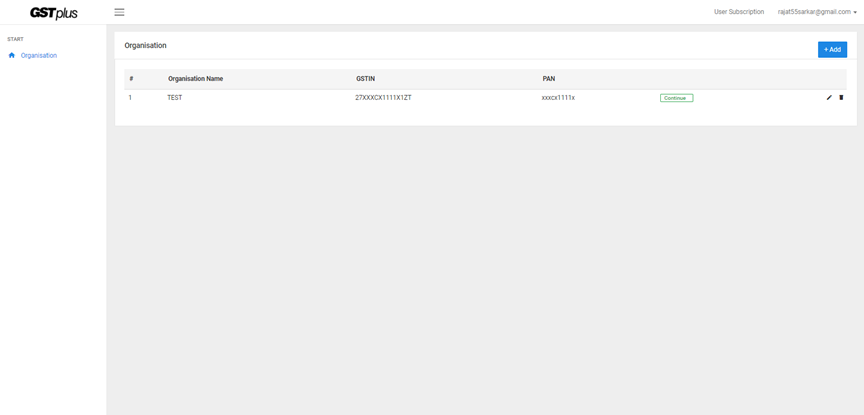
Step 3 Now logon to GSTplus.com (Log-in) or Sign-Up if not already. Click on ‘+Add’ button to add your Organisation or click on ‘Continue’ if already added.
Step 4 On the Left Menu, click on ‘GSTR-3B’ >> ‘Import GSTR-3B’

Step 5 Select Return period (Month and Year) to continue.

Step 6 Choose the *.GST file created earlier and click on ‘Submit’.

Step 7 Now you shall be able to see the Balance tax payable. Click on ‘Okay’ to see GSTR-3B return details.

Step 8 GSTR-3B details will be shown as below. You have multiple options to proceed from here.
(a) You can 'download pdf' from here and enter exactly same on gst.gov.in portal as demonstrated below using Online method there under GSTR-3B.

(b) You can download Json file (from Left Menu option, GSTR-3B>> Send to GSTN >> Download Json) and upload the same on gst.gov.in portal as offline method there under GSTR-3B.
(c) You can SAVE the records directly on gst.gov.in portal using api (from Left Menu option, GSTR-3B>> Send to GSTN >> Save to GSTN).

If you wish to file GSTR-3B directly from gst.gov.in portal, read this guide on gstr-3b.
Comments